My Uploads
Once the users submit their CAD drawings, they can track the real-time status of their previously uploaded tasks. Once the CAD files are uploaded, its features are extracted to the GIS store.
To track the status of previously uploaded tasks:
1. In the OnPoint website, click Upload in the Data Center section. The Upload CAD Drawings page appears.
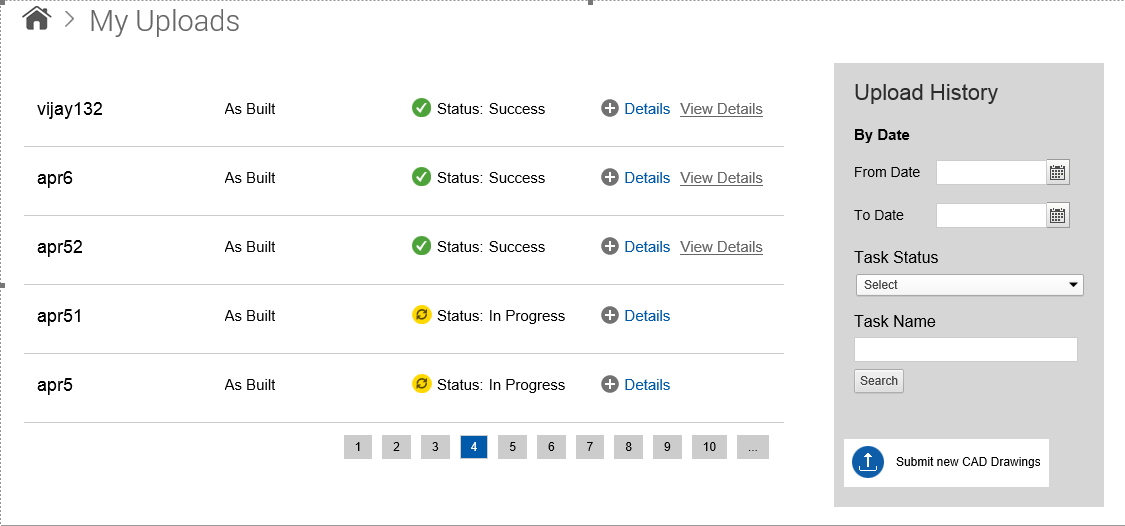
2. In the My Uploads section, click View All. The My Upload page appears and displays the status of all tasks that you have uploaded.
3. To view detailed status of a upload, expand Details.
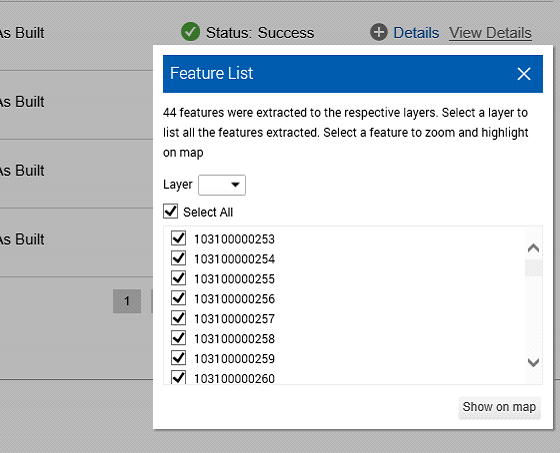
4. To view the extracted GIS features in the map viewer, click View Details hyperlink. The CAD to GIS dialog box appears.
5. From the Layer drop-down, select a layer to display all the extracted features pertaining to that layer.
6. Select any features you want to zoom and highlight on the map.
7. (Optional) To zoom and highlight all the features on the map, select Select All.
8. Click Show on Map. The extracted features appear in the map viewer.
You can also view the upload history of tasks by their status and name in a specified time frame.
To view the upload history in a particular time frame:
1. In the By Date section, select the start and end date.
2. From the Task Status drop-down list, select whether you want to view in-progress, completed, failed or yet-to-start tasks.
3. In the Task Name field, enter the task name.
4. Click Search.
In addition to viewing upload history, you can also submit new CAD drawings in the My Uploads page.
To submit new CAD drawings:
• Click Submit New CAD Drawing. The Submit CAD Drawings page appears.
For more information on the remaining steps, see
“Maps” on page 101.