Adding or editing attributes
The Attribute Editor window is where you add or change attribute information for a map feature. Attribute data describes the nongeographic characteristics of map features. You use the Attribute Editor to add or edit this nongeographic data, as opposed to using the Editing tools directly on the map to alter the boundaries of existing map features or to draw new ones. You can access attribute data for a feature by performing a search or selecting that feature on the map.
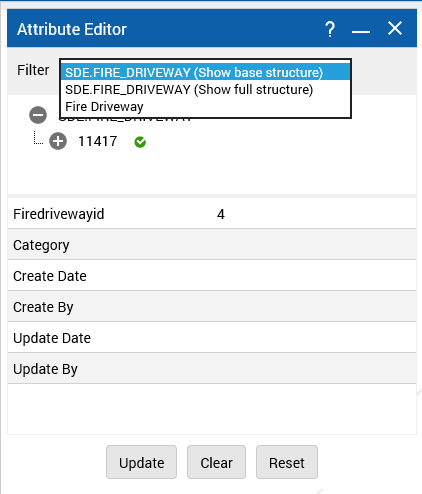
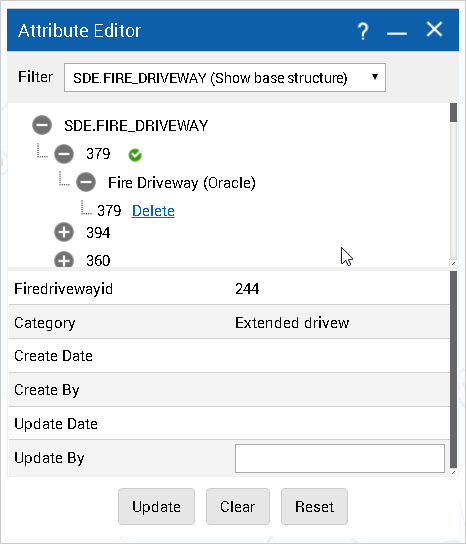
Attributes can be several levels deep—you can tell if an attribute group has related data if it shows a plus icon beside the group name. If a feature has several levels of nested attribute information, it may be easier to select the attribute group that you want to edit from the Filter field instead of expanding each section.
1. To open the Tools pane, from the command bar, select

.
2. From the Tools pane, select Editing. The Editing window appears.
3. In the Edit Layer field, select the layer where you want to edit features.
4. Do one of the following:
• If adding a new feature, select the relevant tool to add the feature, and draw the feature on the map.
• If editing an existing feature, Click the
Start Selection for Editing icon

. The Selection window appears.
The Results windows appear as a list view in the left pane.
5. In the Results window, next to the feature you want to edit, click

and select Edit Attributes. The Attribute Editor appears.
NOTE: | You can also click the Attribute Editor icon  in the Editing window to open the Attribute Editor. |
6. Do one of the following:
• Expand the category within that section until you reach the section you want to edit.
• From Filter, select the attribute group you want to edit for this feature.
7. Edit the required attributes, and click Update.
Adding attributes
1. Expand each section in the Attrubute Editor to view the information for that section. To add new information to a section, click Add. A new item is added under that group.
2. Select the item, and enter information as required. Click Update.
Editing multiple attributes at the same time
If the same information needs to be entered for multiple records, you can use the Attribute Editor to perform a bulk update so you can add common values to more than one record at the same time. For example, if you are a home inspector and you want to enter the same description for all walls and ceilings in all bedrooms in the home you are inspecting, you would perform a bulk update to save the same description to all bedroom records.
1. To open the Tools pane, from the command bar, select
.
2. From the Tools pane, select Editing. The Editing window appears.
3. In the Edit Layer field, select the layer with features you want to edit.
4. Click the
Start Selection for Editing icon
. The Selections window opens.
5. Click a selection tool appropriate for the type of feature you want to edit
6. Select the feature with the tool. The Results windows appear as a list view in the left pane..
7. In the Editing window, click the Attribute Editor icon
. The Attribute Editor opens with the selected items showing their unique IDs.
8. Select the feature group or main category name that these features are displayed under.
9. Enter the information in the required fields and click Update. The entered information is saved for all records in that category.
NOTE: | Only enter information in fields that are the same for all selected features—leave fields blank that do not share common values. |
Related topics
Deleting attributes
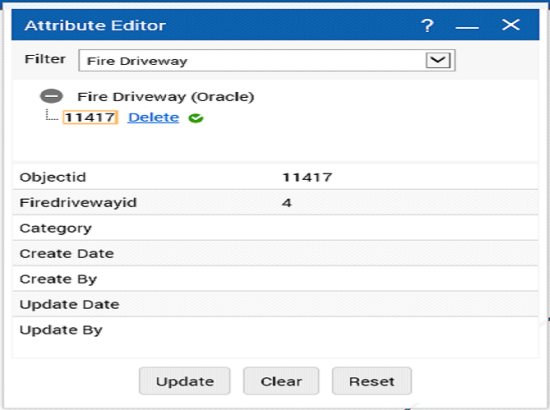
An attribute’s delete options are displayed beside the attribute record.
1. To open the Tools pane, from the command bar, select
.
2. From the Tools pane, select Editing. The Editing window appears.
3. In the Edit Layer field, select the layer where you want to delete feature attributes.
4. Click the
Start Selection for Editing icon
. The Selections window opens.
5. Click a selection tool appropriate for the type of feature you want to delete.
6. Select the feature with the tool. The results are displayed in the Results window and the features are shown on the map.
7. In the Editing window, click the Attribute Editor icon
. The Attribute Editor opens with the selected items.
8. Expand each section or select the group from the Filter field until you open the record you want to delete.
9. Click Delete. The attribute is deleted.
Related topics
- Related Topics