Snapping a newly added feature to a selected feature
In this procedure, you add a point or line feature to the map and select a feature to which you want the new feature to snap. You also specify a snap tolerance, which is a radial distance around the new feature. The feature you want to snap the newly added feature to must be all or in part within this distance.
1. To open the Tools pane, from the command bar, select

.
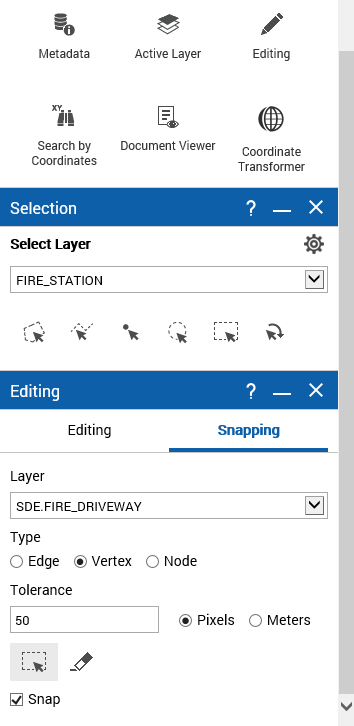
2. From the Tools pane, select Editing. The Editing window appears.
3. Select the Snapping tab.
4. From the Select Layer drop-down list, select the layer containing features you want to snap new features to.
5. In Type, Edge is selected by default, meaning the new feature will be snapped to the closest segment of the feature that is within the tolerance buffer indicated in Tolerance. See explanations for the Type options below.
6. In Tolerance, specify a number of units of radial distance that is added as a snapping buffer around the feature you will add to the map.
• The feature you add to the map is snapped to the closest selected snap feature found all or in part within this tolerance buffer. By default this is a number of pixels. You have the option of selecting Meters as the unit of measure in the drop-down below.
7. Select

and then draw a rectangle over a feature to select it. The selected feature is the feature where your newly added feature will snap to. To clear the selection, select

.
8. Select the Snap option. If you haven’t performed step 7, you are prompted to select one or more features to which you want the new feature to be snapped.
9. Select the Editing tab.
10. From Edit Layer, select the layer where you want to add the new feature.
11. Select the tool applicable for the feature you want to add and have snapped.
• If creating a line, such as a new road, click the
Add Line icon

.
• If creating a point, such as a newly-planted tree, click the
Add Point icon

.
• If creating a polyline, such as a road with several turns, click the
Polyline icon

.
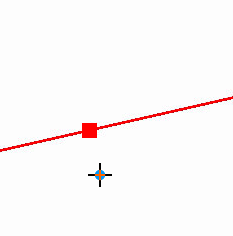
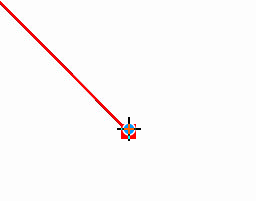
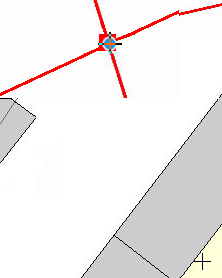
12. To add the first vertex on the map, click at a location within the snapping distance from the feature to which you want the newly added feature to snap.
13. To complete the feature, double-click on the map.
After you have added the new feature, the Attribute Editor window opens.
14. If required, edit any of the available editable fields.
15. Click Update.
Related topics
- Related Topics